Every login screen exposed to the internet gets password-guessing attempts, and GLPI's is no exception. Out of the box, GLPI does not limit how many times someone can get the password wrong. Security Guard, a NexTool module that is free for NexTool customers, counts the failures at the web login, the API, CalDAV and password recovery, temporarily blocks whoever goes over the limit and shows everything on a dashboard, without storing the username in clear text.
The problem: brute force on the GLPI login
Brute force is the simplest attack there is: a bot tries username and password combinations until one works. Well-known variants are credential stuffing (passwords leaked from other services tried against your GLPI) and password spraying (one common password, such as Change@123, tried against many accounts at once). GLPI holds tickets, inventory, contracts and the personal data of the people who open tickets. One compromised technician account opens all of that.
In plain GLPI, the web login accepts attempts indefinitely. You can mitigate at the edge (a WAF, fail2ban reading the web server log), but those tools do not know GLPI: they cannot tell whether an attempt succeeded, they do not separate user from IP and they often block the whole company's proxy by mistake. What was missing was protection inside GLPI itself, one that understands the real result of the login.
How Security Guard works
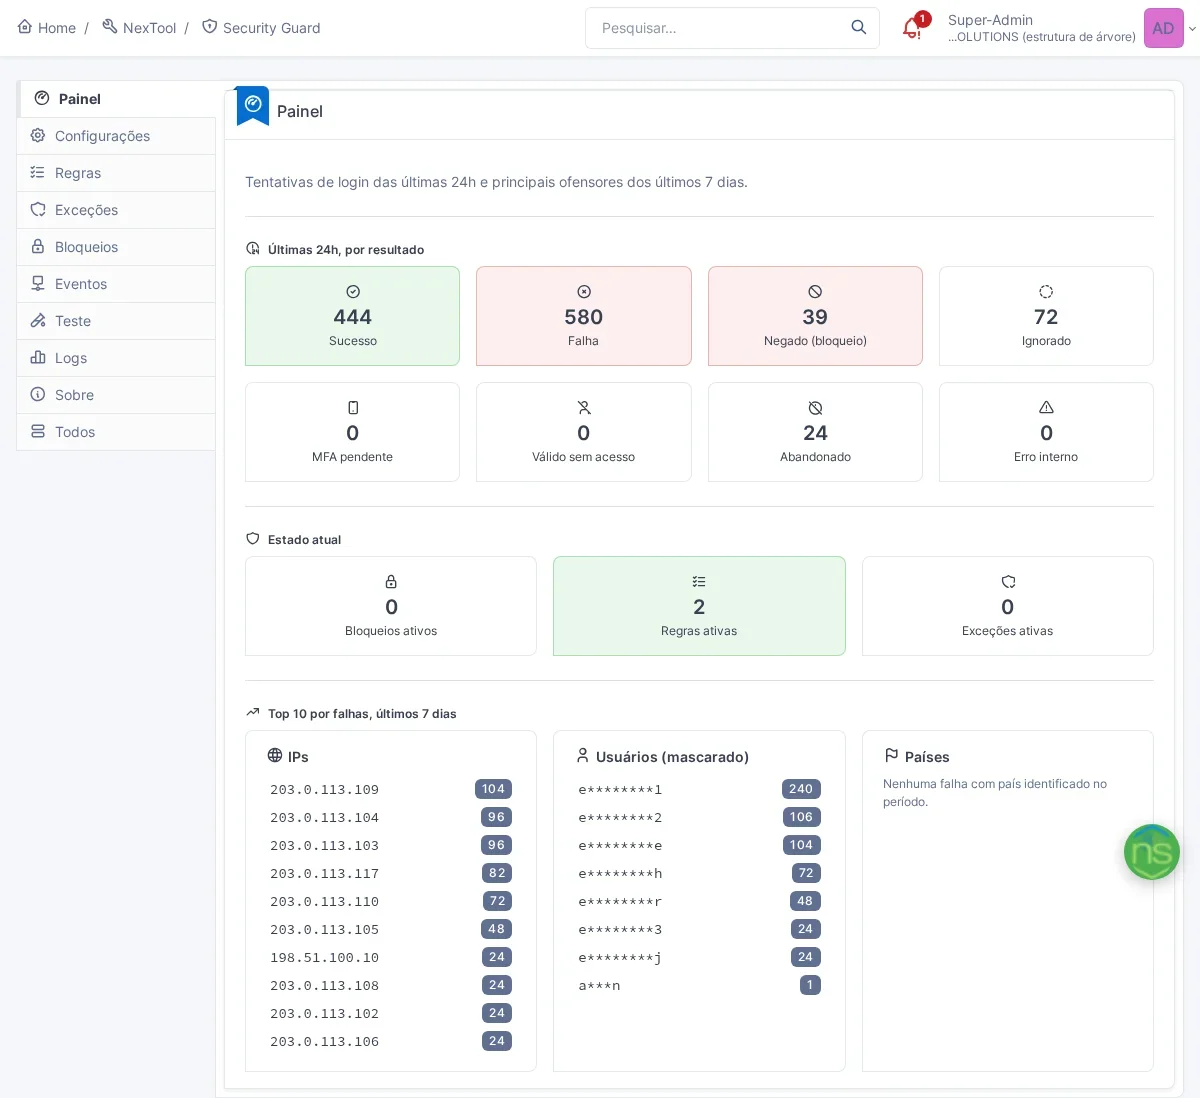
With protection switched on, the module examines every authentication attempt on the channels below, records the result, such as Success, Failure, Denied (block), Ignored or MFA pending, and checks the rules you defined. When a rule is exceeded, further attempts for that key get HTTP 429 in a format the client understands: a temporary lockout page in the browser, JSON on the APIs and plain text on CalDAV, until the period ends or an administrator releases it. While a block is active, the refused attempts do not become events: they only add to the block's counter.
- Web login: the form at
/front/login.php. - REST API (v1):
initSessionwith login and password, Basic Auth oruser_token. Withuser_tokenthere is no user, so only IP rules count. On GLPI 11, the/api.php/v1path is covered too. - GLPI 11 API v2: the token request at
/api.php/tokenwith username and password. - CalDAV (Basic Auth): since the calendar client authenticates on every sync, only wrong passwords and denied access become events; a correct login records nothing.
- Password recovery (
lostpassword.php): each request for a new password counts as an attempt, by IP or by the e-mail entered. GLPI gives the same answer for a right or wrong e-mail, so the rule limits the volume of requests and holds back mass sending and e-mail enumeration. - GLPI 11 MFA/TOTP code: attempts show up in the events, both success and failure, but the module does not rate-limit the code, because GLPI 11 itself already blocks after several wrong attempts.
In the console, the module offers:
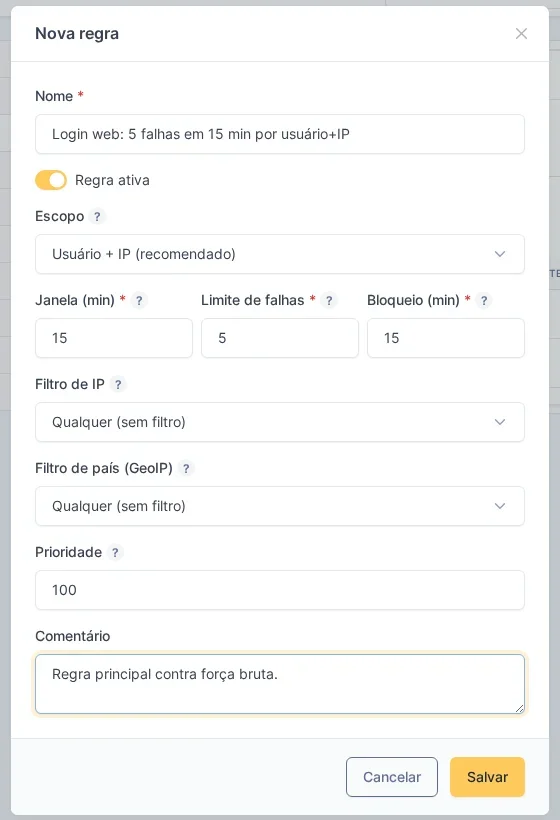
- Scoped rules: each rule sets the window (in minutes), the failure limit and the lockout duration. The scope can be User, IP or User + IP, with priority between rules and an optional filter by IP range (CIDR) or by country. In the Channels field, each rule chooses where it counts: web login, REST API, API v2, CalDAV or password recovery. A new rule starts with all of them checked. Installation creates two ready-made, inactive rules: User + IP (5 failures in 15 minutes, 15-minute lockout) and IP (30 failures in 15 minutes, 30-minute lockout).
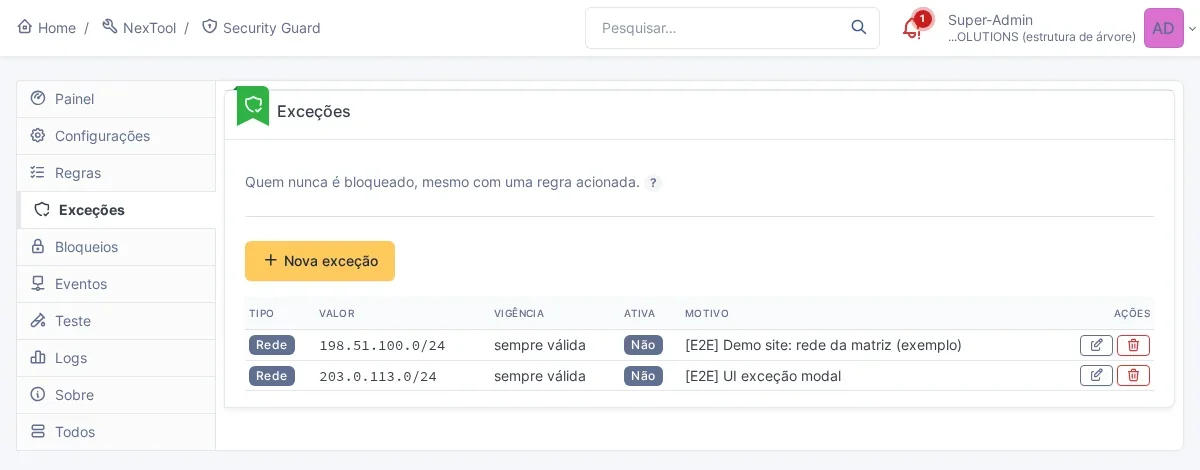
- Exemptions: users, groups, profiles, networks (CIDR) or countries that are never blocked, even when a rule fires. Each exemption can have a validity period with start and end dates.
- GeoIP: with a MaxMind GeoLite2 Country database uploaded from the module's own screen, it resolves the country of each IP. This feeds the dashboard and enables rules and exemptions by country.
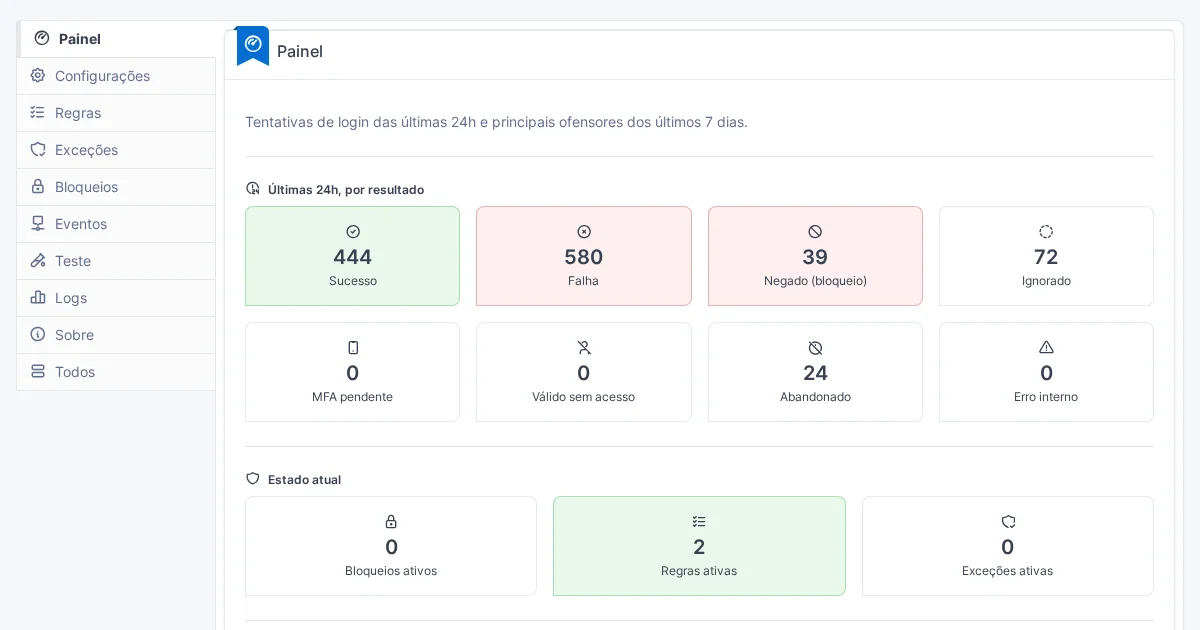
- Dashboard: totals for the last 24 hours by result, a row with the last 24 hours by channel, active blocks, rules and exemptions, and the top 10 IPs, users (masked) and countries by failures and denied attempts over the last 7 days.
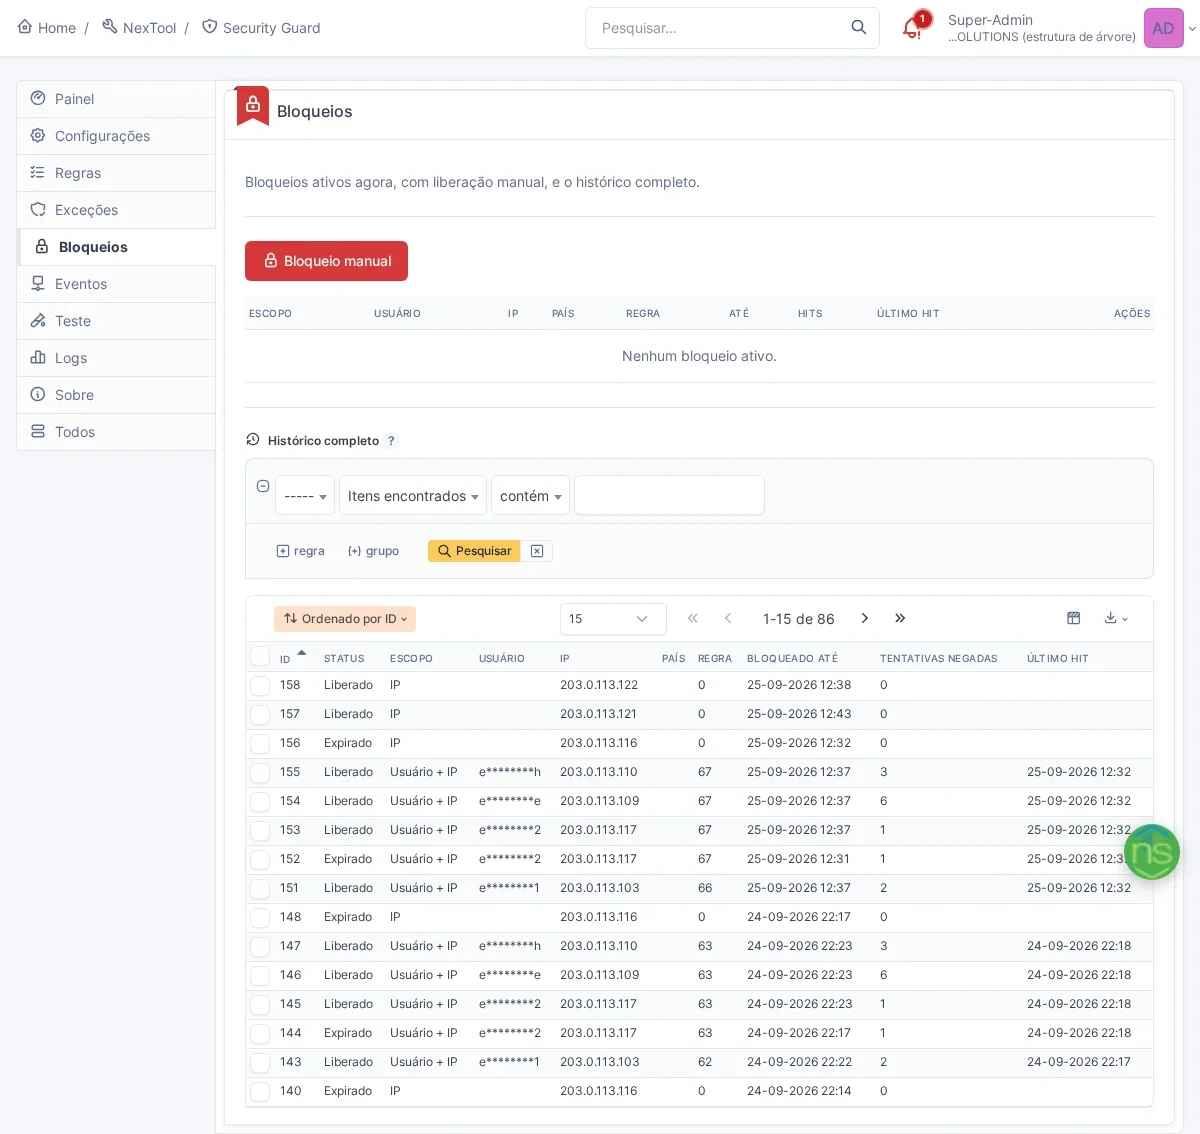
- Blocks: the list of active blocks with a release button, manual block creation and the full history.
- Events: the evaluated and classified attempts, in GLPI's native search, with a Channel column and the user always masked. Attempts refused during an active block only show up in the block's counter.
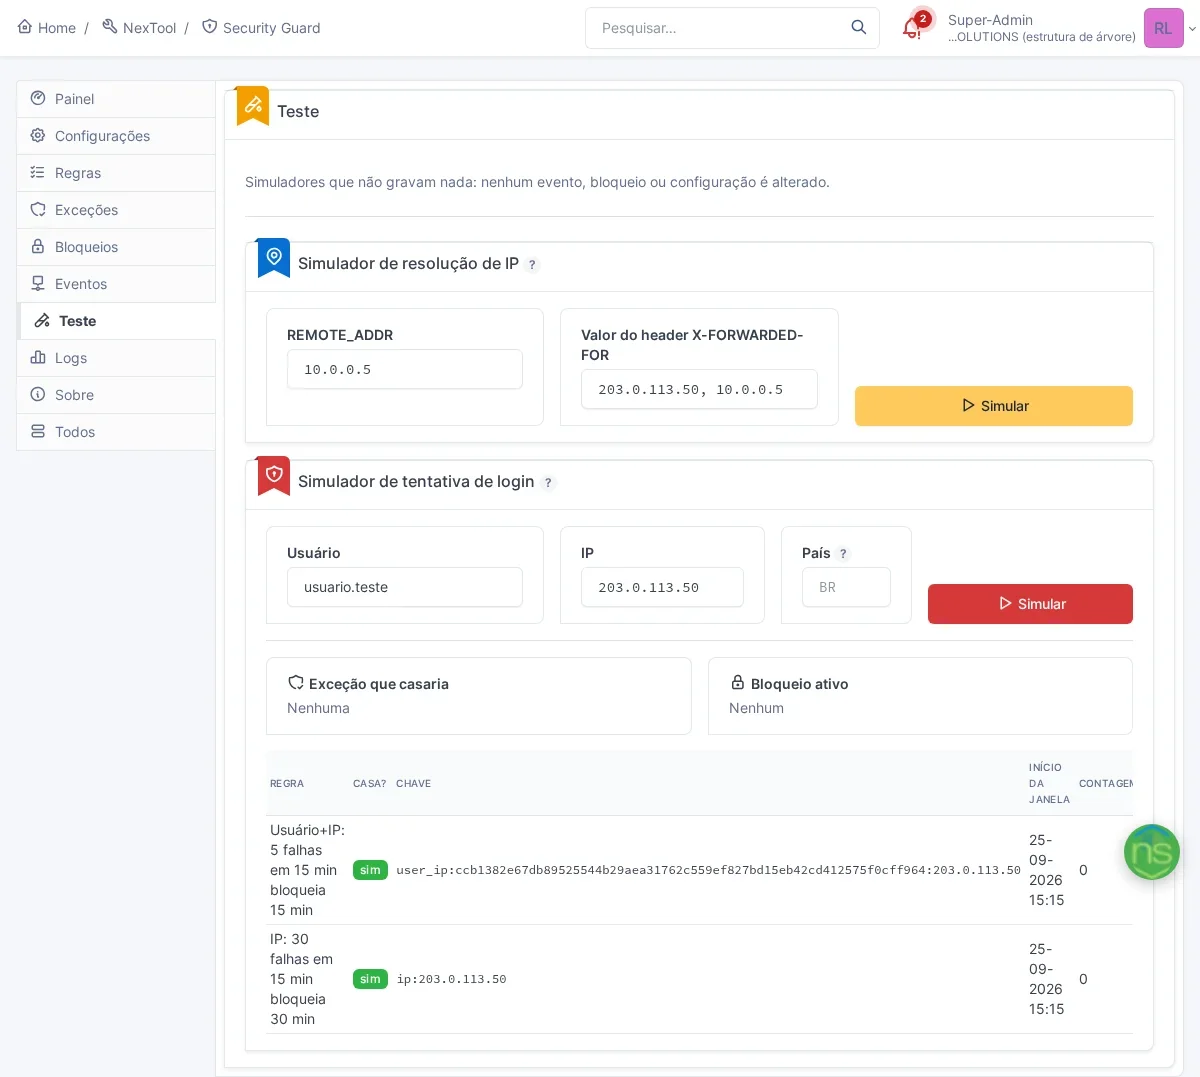
- Test: IP resolution and login attempt simulators that save nothing; the attempt simulator lets you pick the channel. You find out what would happen before turning on a rule.
One detail that makes a difference: the module classifies the real result of the attempt by looking at the response GLPI returned, and it counts the attempt as soon as it starts. A bot firing dozens of requests in parallel cannot get past the limit through a race between them.
Safe activation, step by step
Security Guard ships disabled: the protection switch is off and the two rules created at installation are inactive. Installing the module blocks nobody. However, with protection switched off the module records nothing, so there is no way to “watch before blocking” with the switch off. The safe path is to turn protection on with the rules still inactive and use the Test tab. The order below matters, because a wrong proxy setting can block the whole company.
- Install and enable the module under NexTool > Modules > Security Guard. The console lives under NexTool > Security Guard.
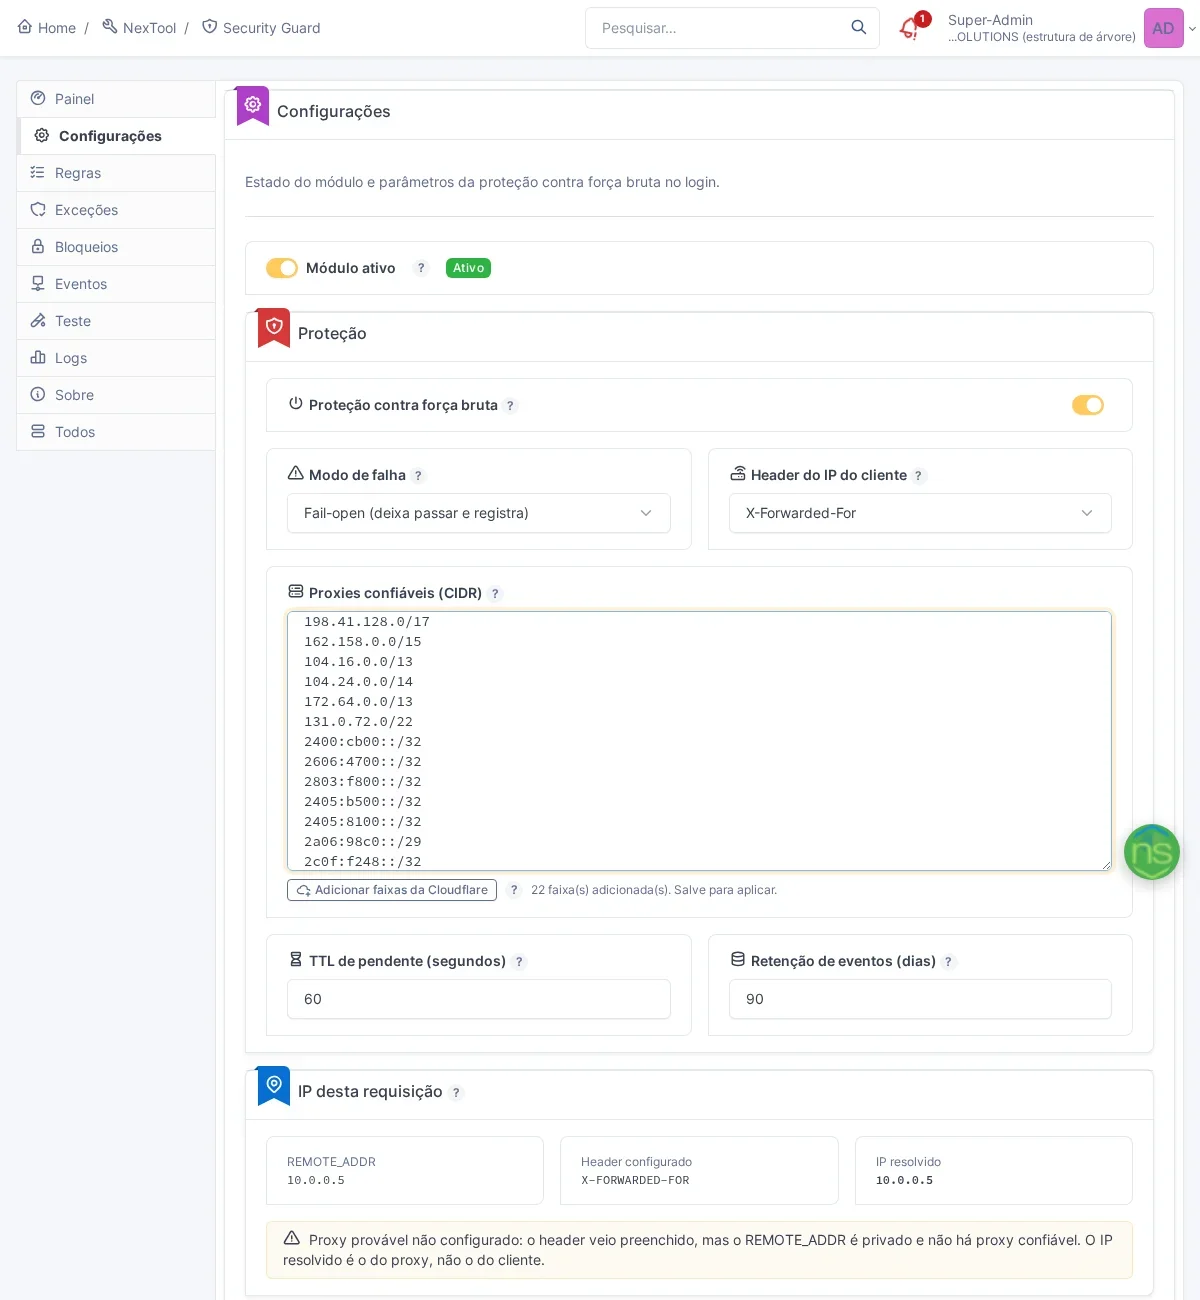
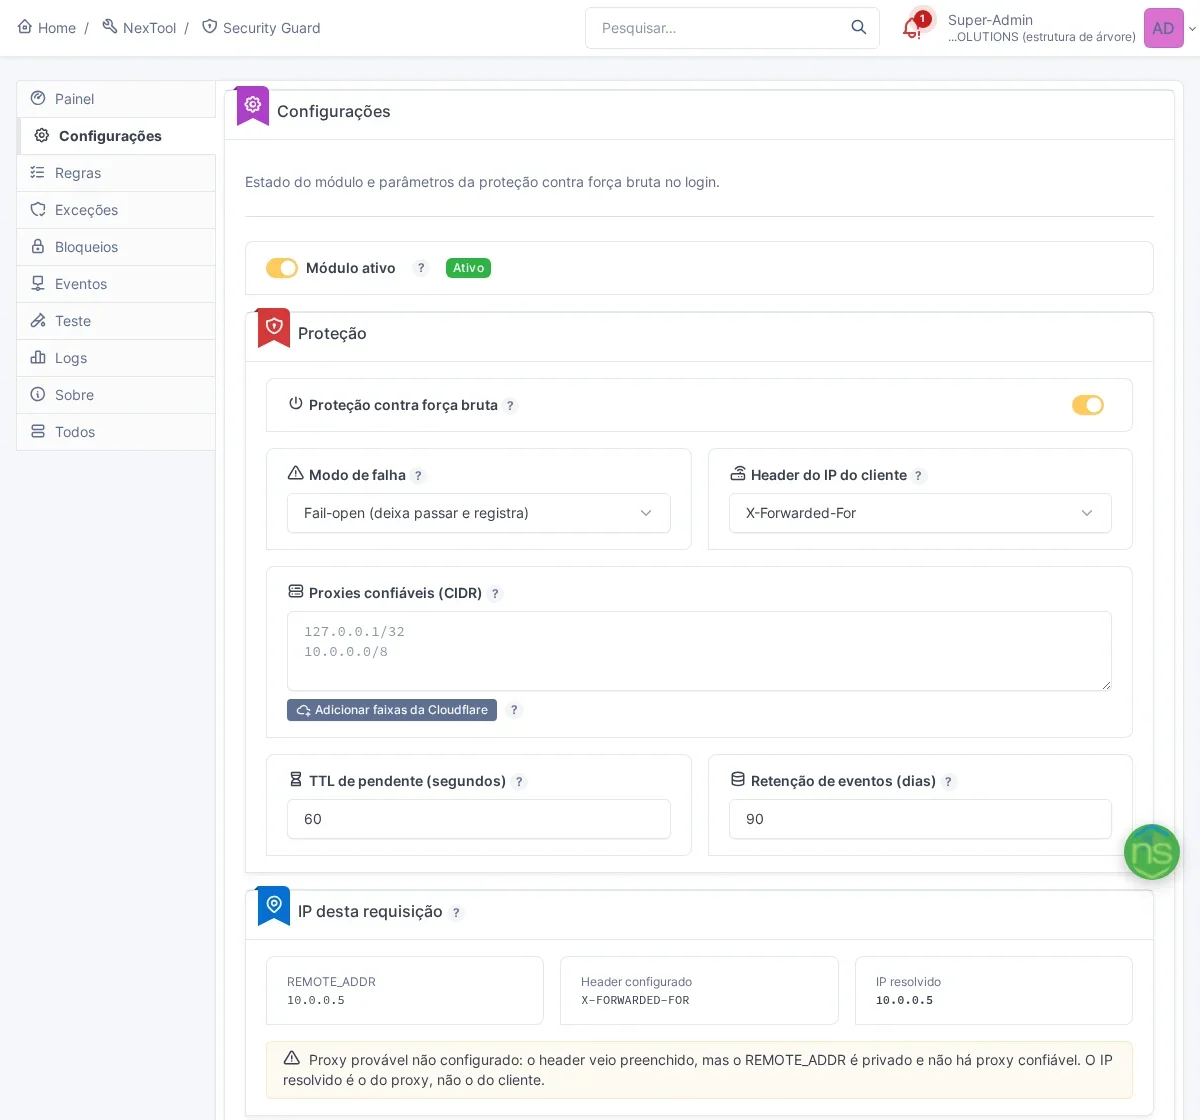
- Set up the trusted proxies BEFORE turning protection on. In the Settings tab, enter in the Trusted proxies (CIDR) field the network of the reverse proxy in front of GLPI (Nginx, NPM, HAProxy, load balancer). Without it, the module deliberately ignores the
X-Forwarded-Forheader (it can be forged) and sees the proxy's IP, not the user's. - If GLPI sits behind Cloudflare, click Add Cloudflare ranges. The button appends the CDN's official ranges to the field, without removing what is already there and without saving on its own. Keep your local proxy's network as well and save. Without the Cloudflare ranges, the resolved IP would be the CDN edge, shared by thousands of people.
- Check the IP header. The default is
X-Forwarded-For; change it only if your proxy usesX-Real-IPorForwarded. - Check the “This request's IP” card. It shows the
REMOTE_ADDR, the header received and the IP the module would resolve right now. The resolved IP must be your computer's, not the proxy's. If the “Likely proxy not configured” alert appears, stop and go back to step 2. - Turn Brute-force protection on with the rules still inactive. With no active rule and no manual block, nobody is blocked, and the Dashboard and the Events tab start showing the classified attempts. Use the Test tab to confirm that a normal attempt of yours would not be blocked.
- Only then turn on a rule with User + IP scope in the Rules tab and check, in the Channels field, where it will count. The ready-made rule comes with 5 failures in 15 minutes and a 15-minute lockout.
Best practices
- Prefer the User + IP scope. It catches the bot that keeps hammering one account from one address, with no side effects for other users.
- Be careful with the User scope on its own. It lets anyone lock a colleague's account just by getting their password wrong on purpose. If you use it, use a high limit and a short duration.
- Be careful with the IP scope on its own behind NAT. A whole office usually goes out through the same public IP. An IP-only rule with a low limit punishes everyone for one person's mistake. If you use it, set the limit well above that of the User + IP rule (the ready-made rule comes with 30 failures in 15 minutes).
- Add exemptions with care. The head office network, an integration profile or a monitoring account can be exempted, preferably with a validity period.
- Watch out for API integrations. A system integrated through the API that keeps getting the password wrong in a loop (an old password, for example) blocks its own IP. Add its network as an exemption or uncheck that channel in the rule.
- For password recovery, use a higher limit than for the login and prefer the IP or User + IP scope.
- Keep the GeoIP database up to date. Updating is manual; the card warns you when the database is more than 60 days old.
Privacy
Recording login attempts involves personal data, so it is worth knowing exactly what the module stores:
- The username is never stored in clear text. Correlation uses an HMAC-SHA256 with a key specific to the installation, and the screen shows only a mask (first and last letter). For successful logins, the event also stores the GLPI user ID.
- The e-mail entered in new password requests follows the same rule: it is stored only as an HMAC, and the screen shows only a mask.
- IP and country are stored in clear text, because they are the very object of the protection.
- For events, you set the retention period: 90 days by default, and 30 days for the administrative log. Cleanup is done by the
secguardmaintenanceautomatic action, every 5 minutes, in external mode: it depends on the GLPI cron being set up on the server. - The block history does not expire in this version and is only removed with the “Delete data” action.
- Uninstalling the module keeps the data; deleting it requires the explicit “Delete data” action, which has its own permission.
Permissions per screen
Security Guard is an administration-only console. The rights are under Administration > Profiles > NexTool tab and vary by screen:
- Dashboard: View Dashboard;
- Events: View Events;
- Blocks: View Blocks, Release blocks and Create manual block;
- Rules: View Rules and Manage Rules;
- Exemptions: View Exemptions and Manage Exemptions;
- Settings and the Test tab: Configure;
- Logs: View Logs.
An action always also requires the right to view the screen: someone with “Release blocks” but without “View Blocks” cannot release anything. This way, a first-line team can, for example, release a blocked user without being able to touch the rules.
Limitations of this version
To be upfront: version 0.2.0 covers the web login, the REST API, the GLPI 11 API v2, CalDAV and password recovery. Still left out, or only partly covered:
- logins through SSO, SAML or
REMOTE_USER, which do not go through the GLPI password; - the GLPI 11 MFA/TOTP code: attempts show up in the events, but the module does not rate-limit the code, because GLPI 11 itself already blocks after several wrong attempts.
There is also no block notification: no e-mail, no alert, no webhook. Follow-up is done in the console, on the Dashboard and in the Blocks and Events tabs.
Who it is for
For anyone who publishes GLPI on the internet for external technicians, customers or branches; for service providers who run several GLPI instances and need to demonstrate access control in audits; and for anyone who has already seen, in the web server log, hundreds of login POSTs coming from the same place.
Compatibility
- Version: 0.2.0
- GLPI: 10 and 11 (the same artifact runs on both)
- Plugin: NexTool 6.22.0 or later
- Plan: Free
- Languages: screens in Portuguese (Brazil and Portugal), English (US and UK), Spanish (Spain and Mexico), French, Italian and German
Next step
Security Guard is part of NexTool, an ecosystem of modules that extends GLPI without code customizations. See the module page or talk to the team for a demo.
Reviewed by the NexTool Solutions team. The screenshots come from a real GLPI environment with the NexTool plugin; IPs and users were replaced with documentation ranges and masks.